댓글 등록 기능을 구현하기 앞서, @RestController 어노테이션과 jQuery의 Ajax를 이용하여
어떠한 화면 동작 없이 데이터를 주고받는 비동기 처리에 대해 알아보자.
REST API 설계 규칙
HTTP 메서드
: CRUD 작업은 다음의 HTTP 메서드를 사용하여 수행된다.
- GET: 자원의 조회
- POST: 자원의 생성
- PUT: 자원의 전체 수정
- PATCH: 자원의 부분 수정
- DELETE: 자원의 삭제
자원(Resource)
자원은 REST API의 핵심 개념으로, 특정 데이터를 나타낸다. 예를 들어, 사용자, 게시글, 댓글 등이 자원이 될 수 있다. 각 자원은 고유한 URI로 식별됨.
REST API에서는 자원을 표현할 때 꼭 명사를 사용해야 한다.
ex) 댓글 등록 - 메서드: POST , 올바른 표현: /comments , 잘못된 표현: /comments/insert
insert, update와 같은 동사가 사용되면 REST 방식이라고 볼 수 없다.
계층 관계 (Hierarchy)
REST API는 자원 간의 관계를 URI에 슬래시(/)를 사용하여 계층적으로 표현할 수 있다.
예를 들어, 사용자와 사용자가 작성한 게시글, 그리고 게시글에 달린 댓글의 관계를 계층적으로 나타낼 수 있다.
ex) 아이디가 "gildong"인 회원 조회 - GET /members/{gildong}
* URI는 절대로 슬래시(/)로 끝나서는 안되며, 알파벳 소문자만으로 작성하는 게 좋다. URI가 길어지는 상황이라면 언더바(_)대신 무조건 하이픈(-) 사용!
댓글 등록 기능 구현하기
1) 댓글 컨트롤러 클래스 생성
CommentApiController.java
package com.study.domain.comment;

import lombok.RequiredArgsConstructor;
import org.springframework.web.bind.annotation.PathVariable;
import org.springframework.web.bind.annotation.PostMapping;
import org.springframework.web.bind.annotation.RequestBody;
import org.springframework.web.bind.annotation.RestController;

@RestController
@RequiredArgsConstructor
public class CommentApiController {

    private final CommentService commentService;

    // 신규 댓글 생성
    @PostMapping("/posts/{postId}/comments")
    public CommentResponse saveComment(@PathVariable final Long postId, @RequestBody final CommentRequest params) {
        Long id = commentService.saveComment(params);
        return commentService.findCommentById(id);
    }

}
2) 상세 페이지에 댓글 작성 영역 추가하기
view.html
    <!--/* 댓글 작성 */-->
    <div class="cm_write">
        <fieldset>
            <legend class="skipinfo">댓글 입력</legend>
            <div class="cm_input">
                <p><textarea id="content" name="content" onkeyup="countingLength(this);" cols="90" rows="4" placeholder="댓글을 입력해 주세요."></textarea></p>
                <span><button type="button" class="btns" onclick="saveComment();">등 록</button> <i id="counter">0/300자</i></span>
            </div>
        </fieldset>
    </div>
3) 동일한 페이지에 JS 함수 작성
댓글 내용과 등록 버튼에 선언된 이벤트를 처리할 함수 작성
// 댓글 길이 카운팅
function countingLength(content) {
if (content.value.length > 300) {
alert('댓글을 300자 이하로 입력해 주세요.');
content.value = content.value.substring(0, 300);
content.focus();
}
document.getElementById('counter').innerText = content.value.length + '/300자';
}
// 댓글 저장
function saveComment() {
const content = document.getElementById('content');
isValid(content, '댓글');
const postId = [[ ${post.id} ]];
const params = {
postId : postId,
content : content.value,
writer : '홍길동'
}
$.ajax({
url : `/posts/${postId}/comments`,
type : 'post',
contentType : 'application/json; charset=utf-8',
dataType : 'json',
data : JSON.stringify(params),
async : false,
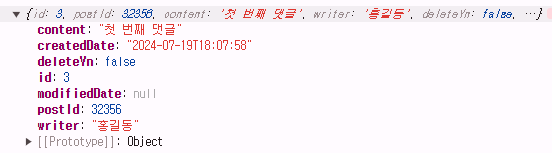
success : function (response) {
console.log(response);
},
error : function (request, status, error) {
console.log(error)
}
})
}
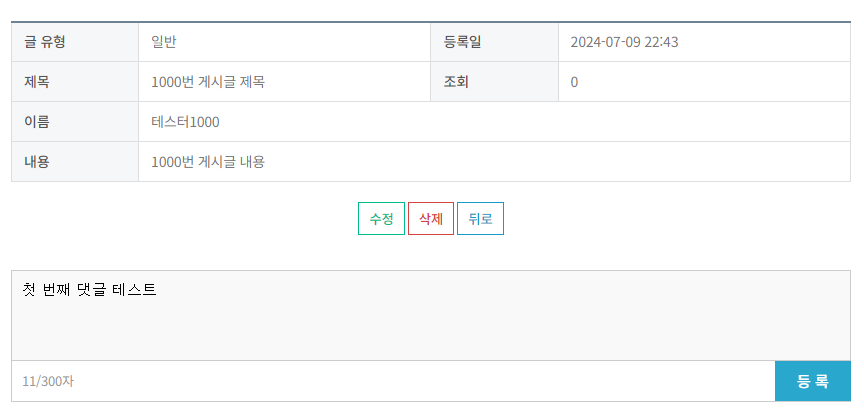
4) 댓글 작성 테스트 해보기


모든 코드는 아래 블로그를 참고합니다
스프링 부트(Spring Boot) 게시판 - REST API 방식으로 댓글 등록 기능 구현하기 [Thymeleaf, MariaDB, IntelliJ,
본 게시판 프로젝트는 단계별(step by step)로 진행되니, 이전 단계를 진행하시는 것을 권장드립니다. DBMS 툴은 DBeaver를 이용하며, DB는 MariaDB를 이용합니다. (MariaDB 설치하기) 화면 처리는 HTML5 기반
congsong.tistory.com
'SpringBoot 게시판 프로젝트' 카테고리의 다른 글
| 스프링부트(SpringBoot) 게시판 만들기 (16) - 댓글 수정 기능 구현 (0) | 2024.07.20 |
|---|---|
| 스프링부트(SpringBoot) 게시판만들기 (15) - 댓글 목록 조회 기능 구현 (0) | 2024.07.20 |
| 스프링부트(SpringBoot) 게시판 만들기 (12) - 페이징 & 검색 기능 구현 (0) | 2024.07.13 |
| 스프링부트(SpringBoot) 게시판 만들기 (11) - AOP와 트랜잭션 개념 (0) | 2024.07.08 |
| 스프링부트(SpringBoot) 게시판 만들기 (10) - 인터셉터 로그 출력 (0) | 2024.07.07 |